Matt's guide
You may be aware of the term UHD (Ultra-HD) or 4K, and the fact it roughly equates to twice the resolution of a ‘Full HD’ or 1080p image. UHD and 4K TVs are selling in shops, and DSLRs with video functions are touting 4K video recording… Even your smart phone might manage a 4K video function! So naturally, higher resolution = higher quality?
The answer isn’t that simple…
Cinema Filming resolution
More and more high end cinema cameras are touting resolutions of 4K and above, and increasingly 35mm films are being scanned at 4K resolution for digital distribution.
But this isn’t always the case…
- The industry standard Arri Alexa digital cameras have filmed at 2K resolution for years, only recently receiving an update to 2.8K resolution. In fact, a specific model is required for 4K resolution.
- The popular RED cameras often boast 6K (and now even 8K) sensors but until recently utilised those extra pixels on the sensor to deliver a denser pixel version of 2k or 4k.
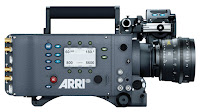 |
| Arri Alexa |
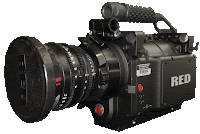 |
| Red ONE |
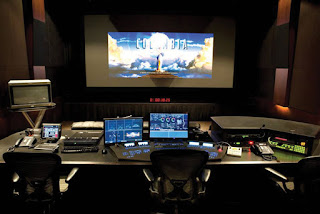 |
| Editing and Grading a DI |
- Film scans have for many years been created at 2K resolution, and since the digital post-production-era have almost always been edited, graded and mastered in a 2K Digital Intermediate or “DI” (its called an ‘intermediate’ because it is the working product rather than the final delivered version, which can be either printed to film or delivered as a digital presentation).
So, assuming the majority of cinema projections you’ve seen in the last ten years have been 2K resolution – would you say it felt the same as footage from a 1080p DSLR? Or did it feel worse than your smartphone’s 4K resolution video? Why not just buy a £400 DSLR with a nice lens and that should match the £40,000 Arri Alexa, resolution-wise – right?
Why sensor resolution isn’t everything
Ignoring the creative and technical disciplines required to make a cinematic lighting set up and the vastly expensive lenses used on cinema cameras, what about the actual camera technology differs?
Stops of dynamic range
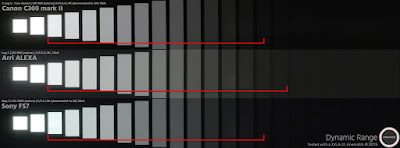 |
| A comaprison of dynamic range stops on three large-sensor cameras |
- Literally the cameras ability to interpret every step between the darkest and lightest parts of the image it captures. The more stops, the more detailed and ‘deep’ the image appears – because it represents a much wider range of colour, light and detail.
- Think especially of bright backgrounds such as a summer sky, which on a consumer camera will often appear flat and single-coloured (or white-out over exposed) when captured alongside a correctly exposed foreground, versus on a professional camera it will appear with gradations of blue and white much closer to how we see it.
- For example: a typical consumer DSLR with HD video will have around 10 stops of dynamic range, whereas a digital cinema camera like the Arri Amira will have 14 stops.
Chroma subsampling
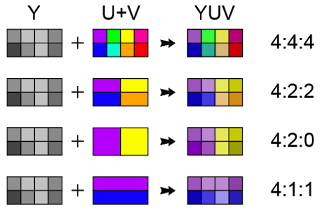 |
| A graphic depiction of how the channels are sampled |
- 4444 vs 4:2:2 vs 4:2:0
- All ways of the camera interpreting chroma, luma and alpha channels of an image
- All you need to know is that a cinema camera can manage RAW 4444, representing the full range of an image; whereas a consumer camera will typically offer 422 which ‘subsamples’ to create an overall image. This offers less image complexity to work with when editing and grading.
Compression
- Similar to the above, your DSLR or Smart phone will output even the highest resolution footage it takes in a ‘lossy’ codec such as H.264 and stored in a compression container such as MP4, AVI or mpeg-2.
- Whilst digital cinema cameras can also output in this way, they can also output RAW footage, or uncompressed codecs optimised for editing such as Apple ProRes 4444 or Avid’s DNxHD.
- Compression HAS to happen at some point in your production chain, but the optimal time is in the post-production phase (as you would compress digital cinema camera footage for delivery), NOT before you’ve even taken it out of your camera (as you’ll find in consumer cameras).
8 bit vs 10 bit vs 12 bit
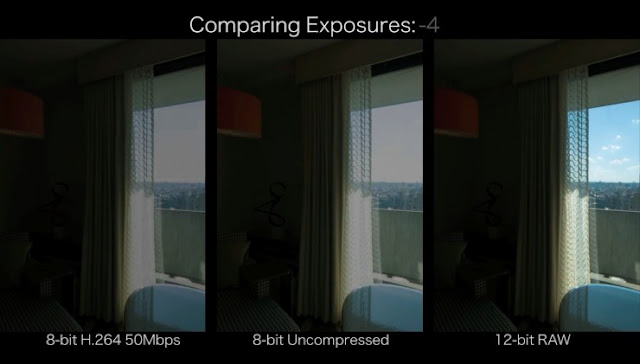 |
| note the differences in the sky outside and the shadow detail around the corner of the room |
- Again, like above, this represents the various levels of depth in an image. There is an effect called ‘posterisation’ where colours seem to not blend as well that is a result of 8-bit recording versus the smoother gradation of 10 or even 12 bit.
Bit rate
- Not to be confused with the ‘bits’ above, this is literally the amount of data that is recorded every second – therefore the higher the bit rate, the more information is being captured from the sensor per-second (and most likely the less compression is taking place).
- For example: an Arri Alexa XT has a 330mbps bit rate, versus a typical consumer/”prosumer” DSLR bit rate which varies between 30 and 100mpbs.
Log footage versus video
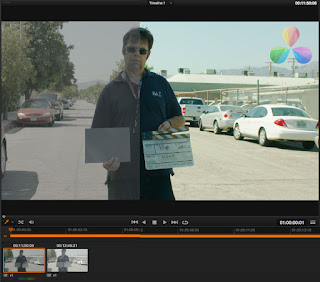 |
| An example Log image being graded, note the desaturated and flat Log image versus the graded image side |
- ‘Log’ footage is what digital cinema cameras (and increasing numbers of high end video DSLRs) can record their video in.
- It mimics the flat, un-saturated, low contrast image of the actual sensor, so that colour grading can work with the widest possible dynamic range.
- LUTs (look up tables) are created for digital cinema, often to mimic the characteristics of film processing. This goes back to film days when a camera would record a ‘flat’ image to the film stock (which had its own characteristics) and then the particular processing of that film stock added a further level of character to the image.
So why bother if it can’t match up to cinema cameras?
If anything, this highlights how much more important effective lighting, sound, and production design is than resolution.
Many great films have been made on incredibly basic camera set ups, because it’s not about the tools you use but the image captured… the important thing is not to get hung up on resolution. Lest we forget, Danny Boyle shot 28 Days Later on standard definition DV tape cameras from Canon (and we have two of them if you wanted to rent an old-school video camera)!
And a final quote from cinematography legend Roger Deakins (Skyfall, No Country For Old Men):
I was in Albuquerque shooting Sicario and they were talking about [shooting formats] and they said, “I don’t know how you feel about it, but I think we want to go on film.” And I said, you know, “I don’t mind. I’ll shoot it on a cell phone if you like. I don’t mind. I really don’t.”



